Search Projects

Sunday, December 4, 2011

Different font styles in OpenGL : a demo

font-styles


Description:  Program to demonstrate the use of  the different font styles that can be used up in OpenGL. Well more and more of the fonts can be added and the project can be made more complex by adding menus and selection. The program is simple to understand and develop. 
More Fonts can be added by using the functions of the fonts available in the OpenGL. Find that with help, or just select the current font and choose 'got to definition of the 'choosen font' '.


USAGES: none.

Project Code: Download


Complexity Addition : 1. Add motion to the text in any of the way ie. horizontal movement, vertical movement or zig-zag etc.
2. Make the text stay at their place but rotate them either clockwise or anti-clockwise directions. Spinning will also be good. 
3. Display each font styles as in like random pages. 
Must add colours to the text.

Saturday, December 3, 2011

6th Sem Computer Graphics Mancala board games


Mancala board games

Description: Mancala is a family of board games played around the world, sometimes called "sowing" games, or "count-and-capture" games, which describes the game-play. The list of mancala games best known in the Western world includes Kalah and Oware. Other games are Congkak, Omweso, Ünee tugaluulakh, Bao, Sungka and Igisoro. Read More on Wikipedia.

USAGES: Use arrow keys to move and press enter for play.
Begin the game with left click and then right and then read the instructions, how to play the game. After finishing the reading proceed to play by left click.

Project Code: call 8147656011 or email openglprojects@gmail

Add sound effect by having the sound in the same folder as of the source code. Replace the following sound by searching in the code, with your own!
sounds:- start, end, coin, rubber, sword.

Watch Video Demo on Youtube-


Monday, November 28, 2011

A mini-projects with Particles Drop on Sphere

Particles Drop

Description:  Program to demonstrate the use od particle system in the OpenGL. This project have a sphere over which the particle fall and the speed of particle falling per second is shown in right. It is one of the hardest project to understand and implement. It has alots of factor in concentration.  The texture as well as the speed of the falling particles. 

USAGES: Right Click to see the options


       [f]   Fog on/off  
       [t]   Spray type 
       [s]   Collision spheres
       [-]   Less flow
       [+]   More flow 
       [p]   Smaller points 
       [P]   Larger points 
       [l]   Toggle points/lines
       [#]   Toggle framerate on/off 
       [~]   Toggle fullscreen on/off


       Use the numeric keypad to move the spheres

       [!]   Change active sphere , 0
       
   Startup: Press Space-bar to initiate.


   Quit: Press Esc key to quit the game. 


Project Code: Download

Sunday, October 23, 2011

Networking based OpenGL Mini-Project : Selective Repeat ARQ


Description: This project deals with the Demonstration of the 'Selective Repeat ARQ'. All the things from successful sending to packet loss as well as the Ack sending and the loss is well demonstrated. There is also timer show to make the project look more realistic. The project is wholly represented the flow of packets in a network and the various aspect that challenges to it.

USAGES: Welcome screen open and which remain for few seconds and the  second page where you will find different menu to view the different demos. Select the Menu and see what you want to view.


SEND  WINDOW : View the sender window
RECEIVE  WINDOWView the receiver window
SAFE  SENDING : Demo the sending of packet from source to destination
PACKET  CRASHING : The loss and crashing of packet is demoed.
TIME  OUT: Packet those which didn't reach at the proper time.
EXIT : Close the program.

After each demo you are asked to go to menu for selection, demo it again press N to no and Y for yes.

Project CodeDownload


Note: Change the speed of flow of packet as per you need as well change the pixels or the coordinate according to the screen.

Thursday, September 29, 2011

Shadow Cube with Fog and Lighting over patterned wall


Description: Shadow over the figure with cube. The checked patterned background and on floor with yellow and blue colour combination. The rectangular cube coloured pale red, keep on rotating on the axis. The motion can be toggled with the either of keyboard or via mouse options. Light can be given to cube and the pattern wall, it can be toggled too. Different kinds of Fogs can be applied to the Cube and the Wall. 
The shadow can be clearly visible even when in the motion. The motion in the shadow is effective. 

USAGES: 
 Both the Keyboard and Mouse can be use to interact with program.


                  Keyboard interaction
                              
                             'L' or 'l' : Lightning on/off
                             'F' or 'f' : Fog on/off
                              '1' :  Linear fogging
                              '2' :  Exponential Fogging
                              '3' :  Double Exponential Fogging
                             'Esc' : Exit


                  Mouse interaction : Right click for the options
                           
                                   Start motion : Start rotating cube
                                   Stop motion : Stop cube rotation.
                                   Toggle fog :    Fog on/off
                                   Toggle lighting : Lightning on/off
                                   Fog type: Fog menus
                                                                     Linear fog :  Linear fogging
                                                                     Exp fog :  Exponential Fogging
                                                                     Exp^2 fog :  Double Exponential Fogging
                                   Quit : Exit


Project Code: Download

Sunday, September 25, 2011

Video Output of Nuclear Power Plant Project

Recently I posted the Project on Nuclear Power Plant demonstration. Now I am posting the Video demo for how the project work out. The video has considered the different output that Project produce.


Thursday, September 22, 2011

MoveLight opengl projects with source code free download

MoveLight

Description:  An amazing project I had seen show far. This program demonstrates when to issue lighting and transformation commands to render a model with a light which is moved by a modeling transformation (rotate or translate). The light position is reset after the modeling transformation is called. The eye position does not change. A sphere is drawn using a grey material characteristic. A single light source illuminates the object.
It uses the different objects like of Torus, Teapot, Dodecahedron, Tetrahedron, Icosahedron.

USAGES:  Pressing the left or middle mouse button alters the modeling transformation (x rotation) by 30 degrees.The scene is then redrawn with the light in a new position.
Right click to choose the different objects like of Torus, Teapot, Dodecahedron, Tetrahedron, Icosahedron. Most of the instruction is fully placed on the Main page of program it self.

Project Code: Download

GlutDino : Generate Dinosaurs with Computer Graphics

GlutDino

Description: A very simple and good OpenGL project that based on the use of light and shadow. A model of Dinosaur is draw and is give different lighting to it. Body part is green and a red eye in the Dino's structure. This project illustrate the use of lighting functions ans show how to change it. The model static and just change according to the light value changes by use. The only two option is there for the light perspective that include for the Right and the Left. 
You can draw your own figure and adjust the lighting as in this project. Make sure the model you draw should have similar base like what the dino has.


USAGES:  At the opening, initial time the figure will have full brightness. Right click and choose the two of the following options
                 
Toggle left light: Remove/Add light in left part(inner) of the dino body.
                 Toggle right light: Remove/Add light in right part(outer) of the dino body


From starting you can have the combination of light either in left or right or both or none of them. Hence a total of four different view will be there.          

Project Code:
 
Download

Monday, September 19, 2011

Nuclear Power Plant Demonstration

Nuclear Power Plant


Description: This one of the best Project posted here. This project demonstrate how a Nuclear power plant use to work. It also demoed the internal reactions as well as the few information related to the Nuclear power plant. It required good knowledge of OpenGL to develop this project. 
As you can see, from the figure the flow digram is developed nicely with right combinations of different polygons to make the structure possible.

USAGES:
  Right click to choose the options.

                   About the project: Explain about the project.Working of Power Plant: Demo the working
                   About Nuclear Power plant: Explain few of the things related to Nuclear power plant.
                   Internal reactions: Demo how the nuclie internaly react to fuse and generate power.
                   Quit:  Close the Program.

Project Code:
 Download

* want to change the speed of of the stream flow change the value in the code.

Tuesday, August 9, 2011

A mini-project : Random Flowing lines (qix like)

Random Flowing lines


Description: An example of a 'qix'-like line demo, but without the traditional erase lines, and with anti-aliased lines. Draws a simple screen saver with colored lines moving in random fashion. The flow of lines make it beautiful.

USAGES: Right click and choose 'Full screen
' to view screen saver in Full screen mode and to have normal viewing choose 'Normal screen'. No other interactions.
To quit the program press 'Escape'


Project Code: Download

Saturday, August 6, 2011

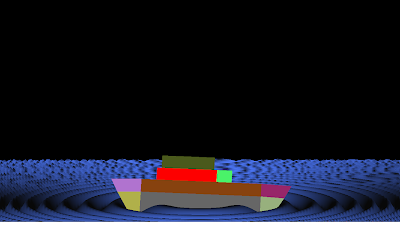
A Mini-Project developing Screen Saver Ship in OpenGL

Description: Draws a simple screen saver with ship floating in the water. The ship move forward and move backward as well. The water also stirs the ship. This is complex Program which used to open in full-screen mode automatically.


USAGES: Left click to move ship backward and right to move forward. To stir the water use the mouse. There is limitation in the moving ship, after sometime the screen became black as it cross the limit.
To quit the program press 'Escape'.


Project Code: Download


OpenGL project implementing the Graphics Editor (paint)


Description: Design and implementation of a simple Graphics Editor. This is paint like computer graphics with opengl which able to draw like paint in windows and save, as well as open the file. Simple drawing with set of colors and the brushes. This Program used many of the OpenGL functions.


USAGE:  Left Click to start and select the shape and draw with mouse.
                Increase/Decrease the pixel by right click and select appropriate option.
                To Exit, right click and select Quit.
                Open saved file and save new one with open and save button at above in menu.
                Clear the screen with clear in upper menu.
                Instruction is also displayed on the screen.


Project Code: Download Graphics Editor in OpenGL


Make the Moving Rings in OpenGL a smart Project


Description:  Program to demonstrate the movement of the rings. A small ring inside a another big ring both shows movement with fade out(which can be zoomed out too). This program demonstrate the use of lists and basic translation functions.  It also uses the basic material function for the touch in the look.

USAGES
:  Right click to see the different options listed below.


          Start over: Star from beginning with smaller ring fading out to bigger ring.
          Zoom out: To zoom out
         Stop rings: Stop the movement of rings
         Stop fade: Will stop fading
         Quit : Exit from program


Project Code: Download

Wednesday, August 3, 2011

Light Torus : Animating Lights over the objects


torus

Description: Program to demonstrate how to add lighting and material properties to a torus.This program extends the program Wrap Torus.  The triangles or quadrilaterals are wrapped around the torus in a single long strip.


USAGES: There are a number of keyboard commands that control the animation.  They must be typed into the graphics window, and are listed below

   CONTROLLING RESOLUTION OF THE TORUS MESH

     Press "W" to increase the number wraps.
     Press "w" to decrease the number wraps.
     Press "N" to increase the number of segments per wrap.
     Press "n" to decrease the number of segments per wrap.
     Press "q" to toggle between quadrangles and triangles.
   
   CONTROLLING THE ANIMATION:

     Press the "a" key to toggle the animation off and on.
     Press the "s" key to perform a single step of the animation.
     The left and right arrow keys controls the rate of rotation around the y-axis.
     The up and down arrow keys increase and decrease the rate of rotation around the x-axis.
     In order to reverse rotational direction you must zero or reset the torus ("0" or "r").
     Press the "r" key to reset the torus back to initial position, with no rotation.
     Press "0" (zero) to zero the rotation rates.

   CONTROLLING LIGHTS:


     Press '1' or '2' to toggle the first or second light off and on.
     Press 'f' to toggle between flat and smooth shading.
     Press 'l' to toggle local modes on and off (local viewer and positional light,or non-local viewer and directional light).

   COMMANDS SHOWING OPENGL FEATURES:


     Pressing "p" toggles between wireframe and polygon mode.
     Pressing "f" key toggles between flat and smooth shading.


Project Code: Download
Header File: Download

Saturday, July 16, 2011

The Memory blocks game


Description:  Program to demonstrate the Memory blocks Game,  in which user need to remember  the inside  pattern  of  cubic block and then match with inside of another cubic block in continuous two step. This program helps in learning to generate random shapes. 

USAGES: Only keyword Control is allotted which are listed below


          Startup: Press Spacebar to initiate the game.


          Navigation:  Upper arrow key to move up, down arrow key to move down and right and left arrow keys to move rightward and leftward respectively. 

         
         Help: Press x for help during the game play.
         
        Quit: Press Esc key to quit the game. 


Project Code: Download

Wednesday, July 6, 2011

Fluids Demonstration

Description:
USES:
Project Code:

#include <stdlib.h>
#include <GL/glut.h>
#include<time.h>
#include<stdio.h>
#include<math.h>


void display(void);
void fluids();


/* for cuboid*/
GLfloat vertices[][3] = {{-1.0,-1.8,-1.0},{1.0,-1.8,-1.0},
{1.0,1.8,-1.0}, {-1.0,1.8,-1.0}, {-1.0,-1.8,1.0},
{1.0,-1.8,1.0}, {1.0,1.8,1.0}, {-1.0,1.8,1.0}};


GLfloat normals[][3] = {{-1.0,-1.0,-1.0},{1.0,-1.0,-1.0},
{1.0,1.0,-1.0}, {-1.0,1.0,-1.0}, {-1.0,-1.0,1.0},
{1.0,-1.0,1.0}, {1.0,1.0,1.0}, {-1.0,1.0,1.0}};


GLfloat colors[][3] = {{0.137225,0.556863,0.137255},{0.137225,0.556863,0.137255},{0.137225,0.556863,0.137255},{0.137225,0.556863,0.137255},
{0.137225,0.556863,0.137255},{0.137225,0.556863,0.137255},{0.137225,0.556863,0.137255},{0.137225,0.556863,0.137255}};


/* for loop */
GLfloat vertice[][3]={{ 0.5,1.0,0.25},{2.5,1.0,0.25},{2.5,0.25,0.25},{2.0,0.25,0.25},{2.0,0.0,0.25},{2.5,0.0,0.25},
{2.5,-0.75,0.25},{0.5,-0.75,0.25},{0.5,0.0,0.25},{1.25,0.0,0.25},{1.25,0.25,0.25},{0.5,0.25,0.25},
{0.75,0.75,0.25},{2.25,0.75,0.25},{2.25,0.5,0.25},{1.75,0.5,0.25},{1.75,-0.25,0.25},{2.25,-0.25,0.25},{2.25,-0.5,0.25},
{0.75,-0.5,0.25},{0.75,-0.25,0.25},{1.5,-0.25,0.25},{1.5,0.5,0.25},{0.75,0.5,0.25},


{0.5,1.0,-0.25},{2.5,1.0,-0.25},{2.5,0.25,-0.25},{2.0,0.25,-0.25},{2.0,0.0,-0.25},{2.5,0.0,-0.25},
{2.5,-0.75,-0.25},{0.5,-0.75,-0.25},{0.5,0.0,-0.25},{1.25,0.0,-0.25},{1.25,0.25,-0.25},{0.5,0.25,-0.25},
{0.75,0.75,-0.25},{2.25,0.75,-0.25},{2.25,0.5,-0.25},{1.75,0.5,-0.25},{1.75,-0.25,-0.25},{2.25,-0.25,-0.25},{2.25,-0.5,-0.25},
{0.75,-0.5,-0.25},{0.75,-0.25,-0.25},{1.5,-0.25,-0.25},{1.5,0.5,-0.25},{0.75,0.5,-0.25}};


GLfloat normal[][3]={{ 0.5,1.0,0.25},{2.5,1.0,0.25},{2.5,0.25,0.25},{2.0,0.25,0.25},{2.0,0.0,0.25},{2.5,0.0,0.25},
{2.5,-0.75,0.25},{0.5,-0.75,0.25},{0.5,0.0,0.25},{1.25,0.0,0.25},{1.25,0.25,0.25},{0.5,0.25,0.25},
{0.75,0.75,0.25},{2.25,0.75,0.25},{2.25,0.5,0.25},{1.75,0.5,0.25},{1.75,-0.25,0.25},{2.25,-0.25,0.25},{2.25,-0.5,0.25},
{0.75,-0.5,0.25},{0.75,-0.25,0.25},{1.5,-0.25,0.25},{1.5,0.5,0.25},{0.75,0.5,0.25},


{0.5,1.0,-0.25},{2.5,1.0,-0.25},{2.5,0.25,-0.25},{2.0,0.25,-0.25},{2.0,0.0,-0.25},{2.5,0.0,-0.25},
{2.5,-0.75,-0.25},{0.5,-0.75,-0.25},{0.5,0.0,-0.25},{1.25,0.0,-0.25},{1.25,0.25,-0.25},{0.5,0.25,-0.25},
{0.75,0.75,-0.25},{2.25,0.75,-0.25},{2.25,0.5,-0.25},{1.75,0.5,-0.25},{1.75,-0.25,-0.25},{2.25,-0.25,-0.25},{2.25,-0.5,-0.25},
{0.75,-0.5,-0.25},{0.75,-0.25,-0.25},{1.5,-0.25,-0.25},{1.5,0.5,-0.25},{0.75,0.5,-0.25}};


/* for fluid to move in loop*/

GLfloat vert[][3]={{0.50,1.0,0.25},{0.50,0.75,0.25},{0.70,0.75,0.25},{0.70,1.0,0.25},
{0.50,1.0,-0.25},{0.50,0.75,-0.25},{0.70,0.75,-0.25},{0.70,1.0,-0.25}};


GLfloat norm[][3]={{0.5,1.0,0.25},{0.5,0.75,0.25},{1.0,0.75,0.25},{1.0,1.0,0.25},
{0.5,1.0,-0.25},{0.5,0.75,-0.25},{1.0,0.75,-0.25},{1.0,1.0,-0.25}};


/* for handle */

GLfloat ver[][3]={{-1.0,0.85,0.05},{-1.0,0.75,0.05},{-1.10,0.85,0.05},{-1.10,0.35,0.05},{-1.0,0.35,0.05},
{-1.0,0.45,0.05},{-1.05,0.45,0.05},{-1.05,0.75,0.05},{-1.05,0.85,0.05},{-1.05,0.35,0.05},
{-1.0,0.85,-0.05},{-1.0,0.75,-0.05},{-1.10,0.85,-0.05},{-1.10,0.35,-0.05},{-1.0,0.35,-0.05},
{-1.0,0.45,-0.05},{-1.05,0.45,-0.05},{-1.05,0.75,-0.05},{-1.05,0.85,-0.05},{-1.05,0.35,-0.05}};

GLfloat nor[][3]={{-1.0,0.75,0.15},{-1.0,0.65,0.15},{-1.10,0.75,0.15},{-1.10,0.25,0.15},{-1.0,0.25,0.15},
{-1.0,0.35,0.15},{-1.05,0.35,0.15},{-1.05,0.65,0.15},{-1.05,0.75,0.15},{-1.05,0.25,0.15},
{-1.0,0.75,-0.15},{-1.0,0.65,-0.15},{-1.10,0.75,-0.15},{-1.10,0.25,-0.15},{-1.0,0.25,-0.15},
{-1.0,0.35,-0.15},{-1.05,0.35,-0.15},{-1.05,0.65,-0.15},{-1.05,0.75,-0.15},{-1.05,0.25,-0.15}};


/*
GLfloat colors[][3] = {{0.0,0.0,0.0},{1.0,0.0,0.0},
{1.0,1.0,0.0}, {0.0,1.0,0.0}, {0.0,0.0,1.0},
{1.0,0.0,1.0}, {1.0,1.0,1.0}, {0.0,1.0,1.0}};


*/


/* for left arrow */

GLfloat v[][3]={{-0.10,0,0.25},{0.15,0,0.25},{0.15,0.15,0.25},{0.4,-0.15,0.25},{0.15,-0.40,0.25},{0.15,-0.25,0.25},{-0.10,-0.25,0.25},

{-0.1,0,-0.25},{0.15,0,-0.25},{0.15,0.15,-0.25},{0.4,-0.15,-0.25},{0.15,-0.40,-0.25},{0.15,-0.25,-0.25},{-0.10,-0.25,-0.25}};


GLfloat n[][3]={{0,0,0.25},{0.25,0,0.25},{0.25,0.15,0.25},{0.5,-0.15,0.25},{0.25,-0.40,0.25},{0.25,-0.25,0.25},{0,-0.25,0.25},

{0,0,-0.25},{0.25,0,-0.25},{0.25,0.15,-0.25},{0.5,-0.15,-0.25},{0.25,-0.40,-0.25},{0.25,-0.25,-0.25},{0,-0.25,-0.25}};


/*  right arrow  */

GLfloat v1[][3]={{2.60,0,0.25},{2.85,0,0.25},{2.85,0.15,0.25},{3.1,-0.15,0.25},{2.85,-0.40,0.25},{2.85,-0.25,0.25},{2.60,-0.25,0.25},

{2.60,0,-0.25},{2.85,0,-0.25},{2.85,0.15,-0.25},{3.10,-0.15,-0.25},{2.85,-0.40,-0.25},{2.85,-0.25,-0.25},{2.60,-0.25,-0.25}};


GLfloat n1[][3]={{2.60,0,0.25},{2.85,0,0.25},{2.85,0.15,0.25},{3.1,-0.15,0.25},{2.85,-0.40,0.25},{2.85,-0.25,0.25},{2.60,-0.25,0.25},

{2.60,0,-0.25},{2.85,0,-0.25},{2.85,0.15,-0.25},{3.10,-0.15,-0.25},{2.85,-0.40,-0.25},{2.85,-0.25,-0.25},{2.60,-0.25,-0.25}};


void sleep(unsigned int msec)
{
clock_t goal = msec + clock();
     while(goal>clock());
}


/* for cuboid */

void polygon(int a, int b, int c , int d)
{
glBegin(GL_POLYGON);
glColor3fv(colors[a]);
glNormal3fv(normals[a]);
glVertex3fv(vertices[a]);
glColor3fv(colors[b]);
glNormal3fv(normals[b]);
glVertex3fv(vertices[b]);
glColor3fv(colors[c]);
glNormal3fv(normals[c]);
glVertex3fv(vertices[c]);
glColor3fv(colors[d]);
glNormal3fv(normals[d]);
glVertex3fv(vertices[d]);
glEnd();
}

/* for loop*/

void polygon1(int a, int b,int c, int d)
{
glBegin(GL_POLYGON);
// glColor3fv(colors[a]);
glNormal3fv(normal[a]);
glVertex3fv(vertice[a]);
// glColor3fv(colors[b]);
glNormal3fv(normal[b]);
glVertex3fv(vertice[b]);
// glColor3fv(colors[c]);
glNormal3fv(normal[c]);
glVertex3fv(vertice[c]);
// glColor3fv(colors[d]);
glNormal3fv(normal[d]);
glVertex3fv(vertice[d]);
glEnd();
}

/* for fluid */


void fluid(int a,int b, int c, int d)
{

glBegin(GL_POLYGON);
glColor3fv(colors[a]);
// glNormal3fv(norm[a]);
glVertex3fv(vert[a]);
glColor3fv(colors[b]);
//glNormal3fv(norm[b]);
glVertex3fv(vert[b]);
glColor3fv(colors[c]);
// glNormal3fv(norm[c]);
glVertex3fv(vert[c]);
glColor3fv(colors[d]);
// glNormal3fv(norm[d]);
glVertex3fv(vert[d]);
glEnd();


}

/* for handle */

void hand(int a,int b, int c, int d)
{

glBegin(GL_POLYGON);
glColor3fv(colors[a]);
glNormal3fv(nor[a]);
glVertex3fv(ver[a]);
glColor3fv(colors[b]);
glNormal3fv(nor[b]);
glVertex3fv(ver[b]);
glColor3fv(colors[c]);
glNormal3fv(nor[c]);
glVertex3fv(ver[c]);
glColor3fv(colors[d]);
glNormal3fv(nor[d]);
glVertex3fv(ver[d]);
glEnd();


}

void leftarrow(int a, int b, int c , int d)
{
glBegin(GL_QUADS);
glColor3f(1.0,0.0,0.0);
// glColor3fv(colors[a]);
// glNormal3fv(n[a]);
glVertex3fv(v[a]);
// glColor3fv(colors[b]);
// glNormal3fv(n[b]);
glVertex3fv(v[b]);
// glColor3fv(colors[c]);
// glNormal3fv(n[c]);
glVertex3fv(v[c]);
// glColor3fv(colors[d]);
// glNormal3fv(n[d]);
glVertex3fv(v[d]);
glEnd();
}


void rightarrow(int a, int b, int c , int d)
{
glBegin(GL_POLYGON);
// glColor3fv(colors[a]);
glNormal3fv(n1[a]);
glVertex3fv(v1[a]);
// glColor3fv(colors[b]);
glNormal3fv(n1[b]);
glVertex3fv(v1[b]);
// glColor3fv(colors[c]);
glNormal3fv(n1[c]);
glVertex3fv(v1[c]);
// glColor3fv(colors[d]);
glNormal3fv(n1[d]);
glVertex3fv(v1[d]);
glEnd();
}


void colorcube()
{
polygon(0,3,2,1);
polygon(2,3,7,6);
polygon(0,4,7,3);
polygon(1,2,6,5);
polygon(4,5,6,7);
polygon(0,1,5,4);

}
void pipe()
{
polygon1(0,1,25,24);
polygon1(0,11,35,24);
polygon1(11,10,34,35);
polygon1(10,9,33,34);
polygon1(8,9,33,32);
polygon1(8,7,31,32);
polygon1(7,6,30,31);
polygon1(5,6,30,29);
polygon1(4,5,29,28);
polygon1(3,4,28,27);
polygon1(3,2,26,27);
polygon1(1,2,26,25);
polygon1(12,13,37,36);
polygon1(13,14,38,37);
polygon1(15,14,38,39);
polygon1(15,16,40,39);
polygon1(16,17,41,40);
polygon1(17,18,42,41);
polygon1(18,19,43,42);
polygon1(20,19,43,44);
polygon1(20,21,45,44);
polygon1(22,21,45,46);
polygon1(23,22,46,47);
polygon1(12,23,47,36);
}

void fluids()
{
fluid(0,1,2,3);
fluid(0,1,5,4);
fluid(0,3,7,4);
fluid(3,2,6,7);
fluid(1,2,6,5);
fluid(4,5,6,7);
}

void arrow1()
{
    leftarrow(0,1,8,7);
leftarrow(1,2,9,8);
leftarrow(2,3,10,9);
leftarrow(3,4,11,10);
leftarrow(4,5,12,11);
leftarrow(5,6,13,12);
leftarrow(0,6,13,7);
}

void arrow2()
{
    rightarrow(0,1,8,7);
rightarrow(1,2,9,8);
rightarrow(2,3,10,9);
rightarrow(3,4,11,10);
rightarrow(4,5,12,11);
rightarrow(5,6,13,12);
rightarrow(0,6,13,7);
}


void idleMouse(void)
{
  int j;
  float i;

for(j=1;j<=12;j++)
switch(j)
{
case 1:
  for(i=0;i<1.9;i+=.1)
  {   glPushMatrix();
 glTranslatef(i,0,0);
  fluids();
glPopMatrix();
sleep(15);
 glFlush();
  }
break;

case 2:
  for(i=0;i<.6;i+=.1)
  {   glPushMatrix();
 glTranslatef(1.8,-i,0);
  fluids();
glPopMatrix();
sleep(2);
 glFlush();
  }
break;

case 3:

   for(i=-1.8;i<-1.2;i+=.1)
  {   glPushMatrix();
 glTranslatef(-i,-.5,0);
  fluids();
glPopMatrix();
sleep(2);
 glFlush();
  }

break;


case 4:

  for(i=0.5;i<1.1;i+=.1)
  {   glPushMatrix();
 glTranslatef(1.25,-i,0);
  fluids();
glPopMatrix();
sleep(5);
 glFlush();

  }

break;

case 5:


  for(i=1.25;i<1.8;i+=.1)
  {
       glPushMatrix();
 glTranslatef(i,-1,0);
  sleep(2);
 fluids();
glPopMatrix();
 glFlush();


  }
break;


case 6:

  for(i=1;i<1.6;i+=.1)
  {   glPushMatrix();
 glTranslatef(1.8,-i,0);
  fluids();
glPopMatrix();
sleep(2);
 glFlush();

  }

break;

case 7:

   for(i=-1.8;i<0;i+=.1)
  {   glPushMatrix();
 glTranslatef(-i,-1.5,0);
  fluids();
glPopMatrix();
sleep(15);
 glFlush();
  }

break;

case 8:
  for(i=-1.5;i<-.9;i+=.1)
  {
       glPushMatrix();
 glTranslatef(0,i,0);
  sleep(2);
 fluids();
glPopMatrix();
 glFlush();
  }
break;


case 9:

  for(i=0;i<.9;i+=.1)
  {   glPushMatrix();
 glTranslatef(i,-1,0);
  fluids();
glPopMatrix();
sleep(2);
 glFlush();

  }

break;
case 10:
  for(i=-.9;i<-.4;i+=.1)
  {
       glPushMatrix();
 glTranslatef(.8,i,0);
  sleep(15);
 fluids();
glPopMatrix();
 glFlush();
  }
break;


case 11:

   for(i=-.8;i<.1;i+=.1)
  {   glPushMatrix();
 glTranslatef(-i,-.5,0);
  fluids();
glPopMatrix();
sleep(5);
 glFlush();
  }

break;

case 12:
 for(i=-.5;i<0;i+=.1)
  {
       glPushMatrix();
glTranslatef(0,i,0);

 fluids();
glPopMatrix();
 glFlush();


  }
break;


}
     glFlush();


     glutPostRedisplay();
 glutSwapBuffers();
glFlush();
}


void handle()
{
hand(0,1,7,8);
hand(7,8,18,17);
hand(8,0,10,18);
hand(0,1,11,10);
hand(7,1,11,17);
hand(10,11,17,18);
hand(2,8,9,3);
hand(2,8,18,12);
hand(2,3,13,12);
hand(3,9,19,13);
hand(8,9,19,18);
hand(12,18,19,13);
hand(9,4,5,6);
hand(4,5,15,14);
hand(5,6,16,15);
hand(6,9,19,16);
hand(9,4,14,19);
hand(16,15,14,19);


}


void wire(int p,int q,int r,int s)
{
glBegin(GL_LINE_LOOP);
glColor3f(0.8,0.498039,0.196078);
glVertex3fv(vertices[p]);
glVertex3fv(vertices[q]);
glVertex3fv(vertices[r]);
glVertex3fv(vertices[s]);
    glEnd();
}

void shwire()
{
wire(0,3,2,1);
wire(2,3,7,6);
wire(0,4,7,3);
wire(1,2,6,5);
wire(4,5,6,7);
wire(0,1,5,4);
}


static GLfloat theta[] = {0.0,0.0,0.0};
static GLint axis = 2;
static GLdouble viewer[]= {0.0, 0.0, 5.0}; /* initial viewer location */


void display(void)
{

 glClear(GL_COLOR_BUFFER_BIT | GL_DEPTH_BUFFER_BIT);

/* Update viewer position in modelview matrix */

glLoadIdentity();
gluLookAt(viewer[0],viewer[1],viewer[2], 0.0, 0.0, 0.0, 0.0, 1.0, 0.0);

/* rotate cube */

glRotatef(theta[0], 1.0, 0.0, 0.0);
glRotatef(theta[1], 0.0, 1.0, 0.0);
glRotatef(theta[2], 0.0, 0.0, 1.0);


//colorcube();
shwire();
     pipe();
fluids();
handle();
     arrow1();
arrow2();
idleMouse();

 glutPostRedisplay();
 glFlush();
glutSwapBuffers();

}


void mouse(int btn, int state, int x, int y)
{
if(btn==GLUT_LEFT_BUTTON && state == GLUT_DOWN) axis = 0;
if(btn==GLUT_RIGHT_BUTTON && state == GLUT_DOWN) axis = 1;
// if(btn==GLUT_MIDDLE_BUTTON && state == GLUT_DOWN) axis = 2;
theta[axis] += 2.0;
if( theta[axis] > 360.0 ) theta[axis] -= 360.0;
display();
}


void myReshape(int w, int h)
{
    glViewport(0, 0, w, h);
    glMatrixMode(GL_PROJECTION);
    glLoadIdentity();
    if (w <= h)
        glOrtho(-2.0, 2.0, -2.0 * (GLfloat) h / (GLfloat) w,
            2.0 * (GLfloat) h / (GLfloat) w, -10.0, 10.0);
    else
        glOrtho(-2.0 * (GLfloat) w / (GLfloat) h,
            2.0 * (GLfloat) w / (GLfloat) h, -2.0, 2.0, -10.0, 10.0);
    glMatrixMode(GL_MODELVIEW);
}

/*
void key(unsigned char k,int x,int y)
{
if(k=='1') glutIdleFunc(colorcube);
glutPostRedisplay();
if(k=='2') glutIdleFunc(shwire);
glutPostRedisplay();
if(k=='3') exit(0);
}

*/
void  main(int argc, char **argv)
{
 glutInit(&argc, argv);
 glutInitDisplayMode(GLUT_SINGLE | GLUT_RGB | GLUT_DEPTH);
 glutInitWindowSize(1020, 500);
 glutCreateWindow("Colorcube Viewer");
 glutReshapeFunc(myReshape);
 glutDisplayFunc(display);
glutMouseFunc(mouse);
glutIdleFunc(idleMouse);
//glutKeyboardFunc(key);
// myinit();
glEnable(GL_DEPTH_TEST);
 glutMainLoop();
}