Search Projects

Thursday, December 31, 2015

Cursor Position OpenGL Code Blocks Example

In the previous post in our blog, we have posted about OpenGL mouse position, in similar way today's post we are going to have tutorial about Cursor Position in OpenGL.

Cursor Position OpenGL Code Blocks Example

Do you Know about Code::Blocks?

There are many IDE for C/C+, Like same Code::Blocks is one of the IDE for C/C++/FORTRAN. Built around a plugin framework, Code::Blocks can be extended with plugins. Any kind of functionality can be added by installing/coding a plugin. For instance, compiling and debugging functionality is already provided by plugins!

Cursor Position OpenGL

The coordinate of screen in the OpenGL window starts from upper left corner and we determined the mouse position in same we determine the cursor position in OpenGL. In this post wear going to learn how to get cursor position in screen coordinates. This example is done with Code::Blocks, but can be run on different platforms with little/no modification.

In this post we are going to learn an OpenGL Code Blocks Example of determining the cursor position.

Objective of Program  : Show the position of cursor in c++ using the OpenGL graphics library.

Step By Step Process

Step 1: Create variable that will determine the both X, Y Coordinate of cursor as well as the windows. The code for this as given below - 

GLint x = 10;
GLint y = 20;
GLint WindowWidth = 800;
GLint WindowHight = 600; 

You may change the values!

Step 2 : In each of the OpenGL program we have used the init and Display functions. Hence also we are going to use the same OpenGL Code Blocks Example, with minimal code. These codes are needed in almost all the programs. Find out the use of each functions at OpenGL.org. In our display function we are going to fix the size of the point as well. The Display function will enable us to draw a small square where the cursor position id determined. 

void init()
{
    glClearColor(1, 1, 1, 0);
    glMatrixMode(GL_PROJECTION);
    gluOrtho2D(0, WindowWidth, 0, WindowHight);
}
void display()
{
    glClear(GL_COLOR_BUFFER_BIT);
    glPointSize(20);
    glFlush();
}

Create a Mouse Function

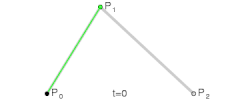
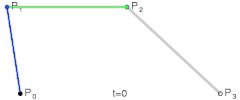
Step 3 : In our mouse function we will determine the cursor position with the left mouse button.  We will check the status of left mouse button, whether it is pressed down or not. Hence we will draw a point when the left mouse button have the status of it's state=down. This determine the coordinate of screen and we know the position of cursor.

As we know that in opengl the coordinate are from upper left corner, so we need to anti alias the y coordinate. Rest of the logic is simple take the position of x and y and create the point there with specified color.

void mouseHandler(int button, int state, int mouse_x, int mouse_y)
{
    if (button == GLUT_LEFT_BUTTON && state == GLUT_DOWN)
    {
        x = mouse_x;
        y = WindowHight - mouse_y;
        // Set line segment color as glColor3f(R,G,B)
        glColor3f(0.5, 0.5, 0.9);
        glBegin(GL_POINTS);
        glVertex2i(x, y);
        glEnd();
        glFlush();
        // Clear display window
        glClear(GL_COLOR_BUFFER_BIT);
    }
}

Step 4 : Main is to be code which is same for the program as all other programs have.

We hope you liked this OpenGL Code Blocks Example, put your suggestion, opinions in the comment below. Watch video below!

How to setup OpenGL in CodeBlocks

SETTING UP OPENGL IN CODEBLOCK
First of all download and install the CodeBlock on your computer from the official website http://sourceforge.net/projects/codeblocks/files/Binaries/13.12/Windows/codeblocks-13.12mingw-setup-TDM-GCC-481.exe/download
After downloading this setup install it on the computer.
Now you have to configure it for the opengl development.
First of all download the freeglut libraries,headers,and system files from the link given below
http://www.mediafire.com/download/b4s0y548eobb5a0/codeblock_freeglut.rar

After downloading this folder it should contain three folders like as shown
 P1Ccfolderdes

Now you have to copy these all three folders and paste it to the given path C:\Program Files (x86)\CodeBlocks\MinGW as shown
P1CCcopyfolderstomingw

It will ask for the either replacing the existing files or not you have to select ok for merging the files with the same name.
Now 50% work here is done Now copy the dll file from the downloaded folder in the bin folder as shown
 P1Ccfreeglut.dll

Paste the above dll file to the following path C:\Windows as shown
 P1CCwindowsfreeglut.dll

Now you have to change the configuration files because first they are set for the glut32 and now we have to change them to freeglut libraries
Open notepad with administrator previledges as shown
 P1CCnotepad

Go to File->Open and select the path as given C:\Program Files (x86)\CodeBlocks\share\CodeBlocks\templates\wizard\glut as shown P1CCwizardglut
Click on the script and press OK for changing the content inside the file and change the content glut32 to freeglut as shown. Find once more if glut32 is present or not if present then change that also to freeglut.
 p1CCglut32tofreeglut

Again open an another file in the notepad open with administrator previledges.Go to the path Go to File->Open and select the path as given C:\Program Files (x86)\CodeBlocks\share\CodeBlocks\templates and open the filenamed cbp and find the term “glut32” and replace it with “freeglut” after the final changes it should look like as shown
 P1CCtemplatechange

Now everything is done. Open CodeBlock and open a new Project and select GlutProject after giving it a project name press next now you have to give its path name as C:\Program Files (x86)\CodeBlocks\MinGW as shown
 P1CCpath

You will get a default opengl code now just press compile and run button that will give you following window as shown

How to install OpenGL Glut in Dev C++

SETTING UP OPENGL IN DEVC++

First of all install the Dev C++ while downloading it from the official website the latest version http://orwelldevcpp.blogspot.co.at/
After downloading it install with the normal configuration. When the installation is done. Open Dev C++.
Go to File->New->SourceFile  you can directly hit the keyboard shorcut Ctrl+N.
Now you have to download the glut files(Library, Header and System files) which can be obtained directly from the link described here.
http://www.mediafire.com/download/fwn0j0n123hn6e1/glutming.rar
Now Unzip the downloaded which will contain three files as shown.

Now you have to put these files to their appropriate places so let do it.
Take glut.h from the downloaded folder and copy it into the path  C:\Program Files (x86)\Dev-Cpp\MinGW32\include\GL  as shown.

Take libglut32.a file from the downloaded folder and put it in the path C:\Program Files (x86)\Dev-Cpp\MinGW32\lib as shown.

Now finally the system file take glut32.dll and copy to the path C:\Windows\System32 as shown.

Before compiling the program follow this last step.
Go to Tools->Compiler->General Tick the following as shown and write this line in the textarea -lglu32 -lglut32 -lopengl32 as shown


Finally compile and run the file you will get the following output as shown.
Updating with Code and image stay tune

Sunday, December 27, 2015

Connect Dots - OpenGL Mouse Position Example

An interactive project features the use of mouse function. Today we are going to have a project based opengl mouse position. The name of projects is - "Connect Dots".

opengl mouse position example

1. About the Project

This c++ opengl project is based on mouse click position. The theme of project is - draws straight lines connecting dots placed with mouse clicks. First one point is drawn on mouse click, next mouse click will draw a point while connecting it with previous point. This process of connecting points will continues till the max allotted points slots is over, after which first point will get deleted as new point is generate, this continues.

2. Opengl mouse click position 

Problem of the project is getting the position of a user mouse click in C/C++ & GLUT (OpenGL). Solution to this is in our myMouseFunc() function. We will typically pass the parameter to this function while adjusting the algorithm as per our requirement. In our mouse function, will condition to check if only left mouse button can create the point. Similarly only on mouse press down, the point to be generate so we use another condition for it. Logic for both is given below -

 if ( button==GLUT_LEFT_BUTTON && state==GLUT_DOWN ) {}

Next is to create logic for what happen when a left mouse button is pressed. We need to record the opengl mouse position (mouse coordinate). In variables will store the both x, y values of opengl window coordinates. These coordinates are further normalized by dividing with height and width.

float xPos = ((float)x)/((float)(WindowWidth-1)); float yPos = ((float)y)/((float)(WindowHeight-1)); 

Since the Position in OpenGL is define from upper left corner so we need to flip the position of 'y' coordinate as given -

 yPos = 1.0f-yPos;

The coordinate of opengl mouse click position is know, we will draw the point. A function call back is done so a point is added while left mouse is clicked.

addNewPoint( xPos, yPos );

3. Draw Lines to Connect Points 

In display callback function we code to draw the line segments. The lines segment can be drawn only when there is two points, hence we check if there is two or more points. The coordinate of the points will be stored in a two dimensional array. We will draw the lines with use of a loop, so each of the two points are connected with a line segment.

if ( NumPts>1 ) { glBegin( GL_LINE_STRIP ); for ( i=0; i<NumPts; i++ ) { glVertex2f( PointArray[i][0], PointArray[i][1] ); } glEnd(); } Our line are ready to display but where are points? For them we need not to check any condtion. We will use the array and simply display the points. glBegin( GL_POINTS ); for ( i=0; i<NumPts; i++ ) { glVertex2f( PointArray[i][0], PointArray[i][1] ); } glEnd();

The color of the points and the lines can be given in this function to whatever desired.

[next]

4. Rendering of Points and Lines

We get the Opengl mouse click position, draw the points and connected them with lines. Now times is to give a little customization by rendering these opengl objects. If we will define the size and width of our points and lines.

glPointSize(8);
glLineWidth(5);

The size and width can be passed as above but we need to give a proper shape to our points. We will implements the anti-aliasing of points and lines. Also we will render the points to be round rather than a square. This is implementation dependent unfortunately, may slow down rendering considerably.

glEnable(GL_POINT_SMOOTH);
glEnable(GL_LINE_SMOOTH);
glHint(GL_POINT_SMOOTH_HINT, GL_NICEST); // Make round points, not square points glHint(GL_LINE_SMOOTH_HINT, GL_NICEST); // Antialias the lines glEnable(GL_BLEND); glBlendFunc(GL_SRC_ALPHA, GL_ONE_MINUS_SRC_ALPHA);

5. Delete the Lines

We have restricted the no of points to be drawn on screen. The variable named 'MaxNumPts'  will have the value to max no points to be shown on screen. As the points crosses this number the first point and line got deleted, this continues further. To process this we have a callback function which removes the points (similar to adding the points). To make this Opengl mouse click position example more interesting, a keyboard function is added. This function will give another interaction with user. Following is the uses -

 Sl. No. Key Functionality
1 a Switch between aliasing
2 esc Exit the Program
3 f Remove First Point
4 l Remove Last Point
5 t  Switch between thicknesses and size

[next]

This Program is taken from the book - 3D Computer Graphics: A Mathematical Introduction with OpenGL, by S. Buss, Cambridge University Press, 2003. The program is modified from the original version a little. The keyboard functionality of switching the alias is not working sometimes. Further you can use a switch function to  changes the thickness and size of lines and points by press the numeric keys.

 Hope you liked this opengl tutorial as well as the project. Download the source code and please comment you thoughts to us.

Monday, December 21, 2015

Drawing Bézier curves in Opengl C++

Curves in Computer graphics is one of the important topics to learn. Today we are going to learn about the about a special curve type - Bezier Curve. First we know about the curves, then what is bezier curves then we will learn drawing bezier curves in opengl.

Curves

Curves are set of indefinite set of points which need not to be straight. Curves are differently defines in mathematics, hence context will tell the proper definition. A curve can be in 2d (plane curves) or in 3d (space or Euclidean Space curves). A line is special type of curve which is straight. A curve is represented with some set of equation called the equation of curve.

Classification of Curves

There are mainly two types of curves -
  • Open Curve : The curves which have no endpoints are called open curves. Eg - Parabola, Hyperbola.
  • Closed Curve : When the curves end points are joined, they are called closed curves. Eg - Circle, Ellipse.
The curves can be further classified into three types -  implicit, explicit and parametric curves.
  • Implicit Curve - These type of curves implicitly represent the set of points on a curve which can be easily tested. The general function form is  - f(x, y) = 0. Eg.  Cricle (x2 + y2 - R2 = 0, R = Radius)
  • Explicit Curve - Curves which is explicitly represented and for each value of x there is only one y can be calculated are Explicit curves. They are generally represented with the function y = f(x). Eg. Cubic curves (Y=aX3+bx2+cx+d)
  • Parametric Curve - The curves that can be represented by parametric form, described by expressing the position of all its points as function of one parameter. The general functional form is P(t) = f(t), g(t). Eg. Bezier Curve.

Bézier Curves

Bézier curves are parametric curves that are generated with the control points. It is widely used in computer graphics and other related industry, as they appear reasonably smooth at all scales. Bézier curves was name after french engineer Pierre Bézier, who discover it. Mathematically Bézier curves is represented as -


Bézier curves are of different degree - linear curves, quadratic curve, cubic curve and high order curve. See the images below taken from wikipedia.

Quadratic Bézier curves

Cubic Bézier curves

Drawing Bézier curves in opengl

To draw bezier curve opengl c++ you need to define the curve center points. First we will define a function that will compute the points of the curve. This functions is very important for drawing bezier curves in opengl. 

 void bezierCoefficients(int n, int *c)
{ int k,i; for(k=0;k<=n;k++)
{ c[k]=1; for(i=n;i>=k+1;i--)
c[k]*=i; for(i=n-k;i>=2;i--)
c[k]/=i;
 } } 

In bezier curve opengl code display function we will define an array that holds the x, y coefficients of end points. In this function only we will define the line width which will define the width of curve. The bezierCoefficients function is called, then we looped it to form the curve. We are going to use the GL_LINE_STRIP to develop the curve. In the drawing bezier curves in opengl we also need to define the glPointSize as well as set the gluOrtho2D to certain x, y values which define the curve path.

I hope you like this article showcasing the bezier curve opengl c++ and learn more about drawing the curve. Download the full bezier curve opengl code from below and tell us about it in comments.


Tuesday, November 24, 2015

Scenery - Java OpenGL Graphics Programming

In this post we are going to learn about the Java OpenGL Graphics Programming or Java OGL Programming. Like C++ OpenGL API Library are also used in Java programming. According to Wikipedia - Java OpenGL (JOGL) is a wrapper library that allows OpenGL to be used in the Java programming language.

Opengl programming in java is compare to C++ is little bit tricky but no hard as you might think. C/ C++ are considered tougher than java, yeah they truly are. In this post we are going to learn Java OpenGL Graphics Programming. For that First we need to understand our requirements.

Prerequisite

Tools installed in your computer - 
  • Java JDK with proper path setup - Download from Oracle.
  • Java Binding for OpenGL - Downlaod it here.
  • IDE like Eclipse with OGL configured (Optional).
For learning Opengl programming in java you must have above tool properly configured. Since Eclipse is most preferred for Working in Java you might like to use it or go for other IDE. You must have the JDK configured and also the check Java OpenGL properly configured. Two folder jar and lib are most important, descriptions are given below. 

jar/ - contains all of the Java bytecode (.class files) for JOGL grouped into .JAR files.
lib/ - contains the native libraries (.so for Linux / OS X, .dll for Windows) for your platform.

About Scenery Opengl programming in java

First we need to know about what we are going to program here. We will program a simple scenery in Java Opengl. The scenery will contain the sun, sky, mountain, tree, road, cars and flag post. You can view the image below.
opengl programming in java

OpenGL in java give you power for graphics programming in java. You can make powerful Java OpenGL Graphics Programming with the use of API. 

First Step :  Create Package

First create a package name it sceneryjogl. Define the class in the package as well. 

package sceneryjogl

public class sceneryjogl{

Initialize the basic codes

Each of the Java Graphics program we will have some basic code that are required to get stated with. First you need to extend the class to proper Applet. Call the init functions and the graphics component functions as well.

Import the Java Packages

Note As you start coding you need to import java AWT and Applet and other packages, import them. Most important don't forget to import the OGL packages. Here is all the imports -

import java.awt.*;
import javax.swing.*;
import java.awt.geom.*;
import java.applet.*;
import javax.media.opengl.GL;
import javax.media.opengl.GLAutoDrawable;
import javax.media.opengl.GLCanvas;
import javax.media.opengl.GLEventListener;

Extend the  Package Class

Here we will extend the main class to JApplet to our program. This help access the necessary files for graphical user interface. Also define the init function and call the paint.

public class sceneryjogl extends JApplet{

public static void main (String [] args){

}
public void init () {  

}
public void paintComponent (Graphics g) {
super.paintComponent (g);
}
}

Next Move is to fill the code. Yeah! Call the Jframe, the container give it title and other attributes to it. Initialize the component and add it to the container. "Edi Haryanto | 8011171 | Absen : 28" can be changed as you want the text to appear. The Program will exit on closing the window.

public static void main (String [] args){ 
JFrame frame= new JFrame ();
frame.setTitle("Edi Haryanto | 8011171 | Absen : 28");
frame.setDefaultCloseOperation(JFrame.EXIT_ON_CLOSE);
JApplet applet= new sceneryjogl ();
applet.init();
frame.getContentPane().add(applet);
frame.pack();
frame.setVisible(true);
frame.setResizable(false);
}
public void init () {  
JPanel panel4 = new Panel2D ();
getContentPane().add(panel4);
}

Now we have to draw the objects. First choose the color you want to add and then fill the object with proper coordinates. Below is the code for green bushes, place the code in paintComponent. Rest of the code can be download with full source code.

//Gambar Tanaman
g.setColor(Color.green);
g.fillOval(0, 500, 30,30);
g.fillOval(25, 500, 30,30);
g.fillOval(50, 500, 30,30);
g.fillOval(15, 480, 30,30);
g.fillOval(32, 480, 30,30);
g.fillOval(90, 500, 30,30);
g.fillOval(115, 500, 30,30);
g.fillOval(140, 500, 30,30);
g.fillOval(105, 480, 30,30);
g.fillOval(122, 480, 30,30);
g.fillOval(180, 500, 30,30);
g.fillOval(205, 500, 30,30);
g.fillOval(230, 500, 30,30);
g.fillOval(195, 480, 30,30);
g.fillOval(212, 480, 30,30);
g.fillOval(270, 500, 30,30);
g.fillOval(295, 500, 30,30);
g.fillOval(320, 500, 30,30);
g.fillOval(285, 480, 30,30);
g.fillOval(302, 480, 30,30);
g.fillOval(510, 500, 30,30);
g.fillOval(535, 500, 30,30);
g.fillOval(560, 500, 30,30);
g.fillOval(525, 480, 30,30);
g.fillOval(542, 480, 30,30);
g.fillOval(600, 500, 30,30);
g.fillOval(625, 500, 30,30);
g.fillOval(650, 500, 30,30);
g.fillOval(615, 480, 30,30);
g.fillOval(632, 480, 30,30);
g.fillOval(690, 500, 30,30);
g.fillOval(715, 500, 30,30);
g.fillOval(740, 500, 30,30);
g.fillOval(705, 480, 30,30);
g.fillOval(722, 480, 30,30);
g.fillOval(780, 500, 30,30);
g.fillOval(805, 500, 30,30);
g.fillOval(830, 500, 30,30);
g.fillOval(795, 480, 30,30);
g.fillOval(812, 480, 30,30);
g.fillOval(870, 500, 30,30);
g.fillOval(895, 500, 30,30);
g.fillOval(920, 500, 30,30);
g.fillOval(885, 480, 30,30);
g.fillOval(902, 480, 30,30);
g.fillOval(960, 500, 30,30);
g.fillOval(985, 500, 30,30);
g.fillOval(1010, 500, 30,30);
g.fillOval(975, 480, 30,30);
g.fillOval(992, 480, 30,30); 

Similarly other objected can be painted using the paint. Download the whole source code for this Java OpenGL Graphics Programming and share you views. If you have any doubt don't hesitate to put your comment and ask the same. Keep learning!

Download the Source file -  Name it as java file and run on your computer.

Thursday, October 8, 2015

A Guide to OpenGL Programming in C#

Most of us didn't try for the OpenGL Programming in C# but it is one of the key area in graphics programming. In this post I will take you to the tour of OpenGL and C# programming.


OpenGL C# Example with Source Code

Solar System is simple and base for all our OpenGL programming and so do we have for OpenGL and C#. The 3D solar system implementation with OpenGL and C#. This is created by programmer name - Vasily Tserekh who had made it simple because it's only meant for educational purposes. It contains the sun, the planets, our moon, the planet’s orbit and some stars. It is programmed in Microsoft Visual Studio, utilizing the TAO namespace and the .NET Framework with Shadowengine. 

Download the OpenGL C# Source code and read more about the Program and it's implementation.

Wednesday, September 23, 2015

Video Demo for implementation of OpenGL Minesweeper

We have tried to figured out many classical implementation through the knowledge of OpenGL and Computer graphics. We have done so many opengl games programs and toady we are going to see another one.

In the previous OpenGL Minesweeper program there are many flaws which cannot be seen in this new program. This OpenGL Minesweeper projects have so many different features that make it worth doing. It. 

Some of the Features of OpenGL Minesweeper - 

  1. Large area of the board.
  2. Number are more clearly visible within the boards.
  3. Different colors being used in the program.
  4. Easy Navigation with the 4 up, down, left, right navigation key.
  5. Game is more colorful version of OpenGL Minesweeper.
Now you have seen this wonderful program and know about some of it's feature. It is better you do in your own way. It would be an idea for you 6th sem vtu student to implement such a great idea for your mini project. 

Watch the Demo below for OpenGL Minesweeper - 

Wednesday, September 9, 2015

VTU CG Lab Projects Report for Clock Programs

Many of the VTU 6th sem students doing mini projects in computer graphics, are looking for CG Lab Projects Report. Though it is difficult to give all the CG Lab Projects Report for all the projects. When ever the source code or the report is available to us, we share with you. 
In most of the cases we try to give the source code and report free but when we have to create the new report or code we have to invest the time. Since we are investing our valuable time so we are charging little amount for CG Lab Projects Report from you.  

Any one looking for CG Lab Projects Report Contact 8147656011 or email at openglprojects@gmail.com, for just at Rs 500.

We have posted the CG Lab Projects on Clock and we are giving you the Report and the PPT for this. The report contains 11 chapters including the essentials snapshots. Download the Project report and power point presentation for the Clock program.

Below is some content for the Clock CG Lab Projects Report.

FUTURE ENHANCEMENTS
               This project has been designed such that it works on the windows platform. The project can be designed using different languages and better graphical interfaces. The following features can be incorporated.
ü  A simple monthly calendar can be displayed along with the clock.
ü  A simple digital timer can be implemented.
ü  Better graphical features like options for the user to change the clock’s color and shape of the clock.
ü  A different style for the digits on the clock, for example, Roman Numbers.

PPT    Report

Note  - This Report and PPT is submitted by DHRUVA  M (1AY10CS017) of ACHARAYA INSTITUTE OF TECHNOLOGY. Thanks for this!
Kindly submit the Reports and PPT and even Source Code with you to help other students.

Monday, August 31, 2015

Bubble Shooter Game Computer Graphics Programs in C

We have shown many Computer Graphics Programs in C but this is special one. This is the Bubble Shooter game written with the use of  OpenGL. You might have played Bubble Shooter game online and would have liked it very much. Do you want to have the bubble shooter games online free play? If yes we have the game out here. This not only free to play and kill time but you can submit this as your mini project in your college.

Bubble Shooter Game Online - Computer Graphics Programs in C

The Bubble Shooter game has two version which is totally written in C. This Computer Graphics Programs in C have exactly the same as you have Bubble Shooter game online. You might want to develop this game and learn to make it more interesting and innovative. Do you want to submit a game project as your cg lab project then I would like to suggest this. It is not only interesting but will let you learn almost all the concept of OpenGL while knowing about how it works.

Features of the Computer Graphics Programs in C

Most important feature of these Computer Graphics Programs in C is that there are two version of Bubble Shooter Game, each with different codes. These codes are written in C language and programmed, debugged, tested in the integrated development environment (IDE) MS Visual Studio.

First version of Bubble Shooter game is simpler one. In this the player have to use both Mouse and Keyword for playing the game. Click the left mouse button to and give direction and press the spacebar to release the bubble. Player can change the screen color or background with options appear via the right click of mouse.

The second version of Bubble Shooter game is better than the first one and it utilized the navigation keys. Player have to use the both left and right navigation key to give direction, for releasing the bubble it's again the spacebar. I feel the second one is better but both these Computer Graphics Programs in C pointing to a good goal. It's your wish to choose either or both for presenting the mini project.

Download the Executable of the both versions Computer Graphics Programs in C.

Advance Traffic Signal C Source Code Projects

OpenGL from CGI has many feature that make it one of the best graphics API. VTU had one of the subject dedicated to the OpenGL Computer graphics, the lab for it as well. The CGV lab projects is written in c/c++. Earlier in the blog we posted many C Source Code Projects including the cgv projects for 6th sem cse about traffic signal. Today in this post we are going to show your Advance Traffic Signal project.

Advance Traffic Signal C Source Code Projects

Features of the Projects

This C Source Code Projects have many of the good features. We are listing the features below -

  1. Traffic light with three signals.
  2. House with tree and lake around it.
  3. Cloud and Sun in the Sky in the day while moon in the night.
  4. There are few vehicles that cross the road with signal installed.
  5. There is user interaction to change the signal color.
  6. User can choose between day and night.
  7. The airplane and comet in the sky can be sought by user.

User Interaction

As all the good projects have a great UI, this C Source Code Projects also have it. There is following UI that help make the project a better option for you to choose for the CGV lab projects. 

Mouse - 
  • RIGHT MOUSE BUTTON to display menu.
  • Choose from SubMenu - 1. Aeroplane 2. Comet
  • LEFT MOUSE BUTTON to quit the program
Keyboard - 

  • Press 'r' or 'R' to change the signal light to red.
  • Press 'g' or 'G' to change the signal light to green.
  • Press 'd' or 'D' to make it day.
  • Press 'n' or 'N' to make it night.
Download this C Source Code Projects in OpenGL.


Tuesday, August 25, 2015

OpenGL ES Tutorial for Android - draw triangle in OpenGL ES

How to draw a triangle in Android OpenGL ES?

There are about billions of Android devices activated till date, and more will add to the list in coming days. These billions of devices have so many of games which uses the graphics to render the objects. These games use OpenGL API to show high performing graphics game.  These games are developed by designers, programmers, developers and others, but to begin this we need to start from a small step. Hence in this OpenGL ES Android tutorial we are going to learn how to draw a triangle in Android OpenGL ES.

Prerequisite

For this OpenGL ES Android tutorial you must know the OpenGL, basic Java, and about  Android Programming. Also your system should have the Android Studio (or Eclipse with ADT Plugin) and Android SDK installed. This Android game Development tutorial will use Android Studio.

Creating the new Project

1.       First Step in this OpenGL ES tutorial is to create a new project without any activity.
2.       Next we need to create 3 classes (3 separate java files) - “MainActivity.java” , “MainRenderer.java” and “MainSurfaceView.java”. These classes are essential for almost all OpenGL ES programming in Android. You can name them a Renderer, SurfaceView or whatever but it is good practice to do like this, it will help in understanding the files.

Main Activity

3.       In the MainActivity we are going to check if Android device support OpenGL ES with specific version. For this check out our previous OpenGL ES tutorial for Android.

MainSurfaceView

4.       Extend the MainSurfaceView with GLSurfaceView and create the constructor in the class. Also include all required imports. Following is the code snippet -

package in.ruks.openglobjects;
import android.content.Context;
import android.opengl.GLSurfaceView;
public class MainSurfaceView extends GLSurfaceView {
    public MainSurfaceView(Context context) {
        super(context);
    }
}

MainRenderer

5.       MainRenderer class will implement the GLSurfaceView.Renderer.  Call all the unimplemented methods in the class. Check the code below –

package in.ruks.openglobjects;
import android.opengl.GLES20;
import android.opengl.GLSurfaceView;
import javax.microedition.khronos.egl.EGLConfig;
import javax.microedition.khronos.opengles.GL10;
public class MainRenderer implements GLSurfaceView.Renderer {
    @Override
    public void onSurfaceCreated(GL10 gl10, EGLConfig eglConfig) {
    }

    @Override
    public void onSurfaceChanged(GL10 gl10, int i, int i2) {
    }

    @Override
    public void onDrawFrame(GL10 gl10) {
    }
}

We are going to render our object here in this class and draw the object. 

Our Triangle Class

6.       Next Step is to create a new class, name  it “Triangle.java”.  This is the class where we are going to define vertices for our object (which is triangle). Here are going to define color for the vertices as well. We have to create buffer for each.
private FloatBuffer vertexBuffer;
    private float vertices[] = {
        0.0f , 0.5f,0.0f,
        -0.5f , -0.5f, 0.0f,
        0.0f , 0.5f, 0.0f
    };
    private float color[] = new float[]{ 0 .0f ,0.5f,0.0f,1.0f };  
           
First we have defined the buffer, which will contain the vertices. Next we have defined the vertices for each side of the triangle.


Final Thought

Reference

http://developer.android.com/reference/android/pm/ ConfigurationInfo.html
http://developer.android.com/guide/topics/graphics/opengl.html


OpenGL Camera and Lightning Project

One of the best way to improve your skills is to go through the minutes part of the subject rather than the profile concepts. We need to learn the basic first and repeat it as much as possible. Keeping this in mind today we are going to see a new project which test your basic knowledge of OpenGL.

There are vast topics in OpenGL which you need to master. One of the basic level concept is about camera. It is important to understand the camera, it's position and views. Another basic concept is about the Lightning which co-exit with camera. In this project we will use these concept to develop the program.


Features of the Projects -

This project has many features which will show the use of Camera and Lightning in OpenGL. The object featured in the projects are -

  • Cube
  • Torus
  • Sphere
  • Car
These objects can have more than one color with option menu. The Lightning options in the menu can also make sure the different lightning conditions. 

Check the Code and Executable on this website.

Friday, July 31, 2015

How to check if Android Device Supports OpenGL ES 2.0

OpenGL ES stands for OpenGL for Embedded Systems also called as GLES. It is subset of OpenGL Computer graphics API for rendering 2D and 3D computer graphics particularly focusing on Hardware Accelerated using GPU. It is used in embedded systems like Smartphones (iPhone, Android Phones), Tablets (iPad, Android Tablets), Video game Consoles (Xbox, Play Station) and PDA (Personal Digital Assistant). Due to it openness and cross platform support, it is quite popular as well as most used graphics API in Smartphone and Tablets.

In this post we are going to know programically if Android Device Supports OpenGL ES 2.0. This is tutorial for OpenGL ES Android Programming . To check if Android Device Supports OpenGL ES 2.0 or not we are going to use very simple code. Let’s get started with it.

Prerequisite

For this our OpenGL ES Android tutorial it is assumed that you basic level of Java and Android Programming. It is also assumed that you are familiar with OpenGL as well. We are going to need some software installed on your computer to begin with our OpenGL ES Android tutorial. We need the following tools –
  • Android Studio (or Eclipse with ADT Plugin)
  • Android SDK

Android Studio is official IDE for Android Development so here I will show the tutorial in it, but you are free to use Eclipse (But why?).

Creating the Project

11.  First Step is to create a new project in Android Studio. Open Android Studio and create a new project but don’t create any activity for this as we are not going to need. You should choose “Add No Activity”. If required for further programming you can create Activity then.

22. Next Step is to create a class “MainActivity.java” (Right click on your package name under java -> new ->class). In this activity class just create the “onCreate” method. In the method we will use the logic to identify OpenGL 2.0. In a condtion we will check the status of OpenGL ES2.0 and toast  the result. Check the code below.

@Override
protected void onCreate(Bundle savedInstanceState) {
        super.onCreate(savedInstanceState);
       
ActivityManager activityManager = (ActivityManager)getSystemService(Context.ACTIVITY_SERVICE);      
ConfigurationInfo configurationInfo = activityManager.getDeviceConfigurationInfo();
Boolean supportes2 = (info.reqGlEsVersion>= 0x20000);
      
if(supportes2){
Toast.makeText(getApplicationContext(),"Your Device Support OpenGL ES2",Toast.LENGTH_LONG).show();
        }
        else{
Toast.makeText(getApplicationContext(),"Your Device doesn’t  Support OpenGL ES2",Toast.LENGTH_LONG).show();          
Log.d("OpenGL ES2", "Your Device doesn't  Support ES2. ("+info.reqGlEsVersion+")");
        }
    }

Explanation

First we created ActitivtyManager object to access or interact with the system services. Now we created ConfigurationInfo object and retrieve the hardware configuration of the device. This object will help us know the GLES version used.  Next we created the variable  supportes2. With reqGlEsVersion we checked the version from the condition we used and stored  result in our Boolean variable. We have used the condition with “0x20000” which represent the GLES version upper 16 bits for major version while lower 16 bits for minor version.

33.  Final Step is to run and check if Android Device Supports OpenGL ES 2.0. Go to Run menu and select “Run ‘app’” or use shortcut shift+f10. Check which toast is called.

Final Thought

Google added support for OpenGL ES 2.0 in Android 2.0 through NDK and Android 2.2 through Java. Today’s Modern Phone almost support the OpenGL ES 2.0 so if you wonder to check higher version like OpenGL ES 3.0 replace  0x20000 with 0x30000 in “Boolean supportes2 = (info.reqGlEsVersion>= 0x20000);” which is supported from Android 4.3.

Please comment below how you liked this tutorial. Give us feedback so we can improve on our OpenGL ES Android tutorial. Stay tune for more tutorials.

Reference


Tuesday, June 30, 2015

How to call built-in applications using intents in Android

Developing android apps specially the games required opengl for providing better graphics. We have seen how to get started with opengl es for android, and will continue the opengl tutorial  for android programming. Today's we are going to learn an important concept in this android development tutorial, how to call built-in applications using intents in Android. This give advantage to developer taking in-build apps and throw user to them if required. Calling built in applications using intents in Android is important as it give user more choices. For example in an app you want user make a call or open a document (pdf) let you use the in-build apps, take off the burden in developing those apps. You might have seen in previous Whatsapp, which let user call from within the app (now they have their own voip).

Android intent example

Lets get started with how to use intent in android. The following Try It Out demonstrates how to call some of the built-in applications commonly found on an Android device. 

Prerequisite


In this android intent example you need the Android Studio or Eclipse with ADT plugin and Android SDK tool. It is also necessary that you must know about some fundamentals of Java and XML as well as about the Android device. We also assume here that you know hello world program for developing android apps. This is a simple beginners tutorial, which hardly take you half an hour to understand, and doing yourself. I am doing this in Android Studio but you may choose Eclipse (remember google officially going to end support for ADT at the end of 2015).

Creating New Project


1. First step : Open Android Studio and Create a new project by selecting 'Start a new Android Studio Project'. Give it a name MyIntent and a package name in.ruks. You can have your own application package names. Click next, choose minimum SDK, in ours case it is API 14 : Android 4.0 (IceCreamSandwich), which accounts for close to 90% of activated android devices. Again click next, select the Blank Activity, Click next. Android will ask to name the activity, keep the default names, click on finish. Android Studio will create the the new Android Project with all the necessary files.

how to create new project in android studio for developing android apps

Set up Project Layout

We are going to use 6 built-in application in this android development tutorial. They are -
  1. Gallery
  2. Call Log
  3. Contact
  4. Dailler
  5. Browser
  6. Map

2. Second step : Now the time to set up the layout of our project. We are going to call 6 built-in applications using intents, hence we will place a button for each in activity_main.xml. You can drag and drop 6 button on the layout or simply create by coding the activity_main.xml file. Check out the code below and add it to activity_main.xml
<button android:id="@+id/button_contacts" android:layout_height="wrap_content" 
android:layout_width="fill_parent" android:text="@string/contacts">
    
<button android:id="@+id/button_gallery" android:layout_height="wrap_content" 
android:layout_width="fill_parent" android:text="@string/gallery">

<button android:id="@+id/button_Dail" android:layout_height="wrap_content" 
android:layout_width="fill_parent" android:text="@string/dial">

3. Third step :  It's bad idea to have the hard coded string in the project. So in this android intent example code, we are given name to each of the button within the strings.xml, which is under the values folder in Android Studio. Add the code below in it -

    MyIntent
    Hello world!
    Settings
    Contacts
    Gallery
    Call a number
    Open Call Logs
    Open Browser
    Open Map
    Exit


Now we have our layout design for this android intent example, we are going to code the java file to call built-in applications using intents.

Creating  event handler


4. Fourth step : In our MainActivity.java file, we are going to declare the button for each of the Button we have created in our layout file.

Button Gallery = (Button) findViewById(R.id.button_gallery);
Button CallLog = (Button) findViewById(R.id.button_calllog);
Button Contacts = (Button) findViewById(R.id.button_contacts);
Button Map = (Button) findViewById(R.id.button_map);
Button Dail = (Button) findViewById(R.id.button_Dail);
Button Broswer = (Button) findViewById(R.id.button_browser);
5. Fifth step : Our Buttons are ready to have some action, now its time to attach the event handler to them. One by one we are going to call setOnClickListener method on each of our Button and call built-in applications. Just place the following code in MainActivity.java
package in.ruks.myintent;

import android.net.Uri;
import android.os.Bundle;
import android.app.Activity;
import android.content.Intent;
import android.view.Menu;
import android.view.MenuItem;
import android.view.View;
import android.widget.Button;

public class MainActivity extends Activity {

    @Override
    protected void onCreate(Bundle savedInstanceState) {
        super.onCreate(savedInstanceState);
        setContentView(R.layout.activity_main);

        Button Gallery = (Button) findViewById(R.id.button_gallery);
        Button CallLog = (Button) findViewById(R.id.button_calllog);
        Button Contacts = (Button) findViewById(R.id.button_contacts);
        Button Map = (Button) findViewById(R.id.button_map);
        Button Dail = (Button) findViewById(R.id.button_Dail);
        Button Broswer = (Button) findViewById(R.id.button_browser);

        Contacts.setOnClickListener(new Button.OnClickListener(){

            @SuppressWarnings("deprecation")
            @Override
            public void onClick(View arg0) {
                // TODO Auto-generated method stub

                Intent myIntent = new Intent();

                myIntent.setAction(Intent.ACTION_VIEW);
                myIntent.setData(android.provider.Contacts.People.CONTENT_URI);
                startActivity(myIntent);

            }
        });

        Gallery.setOnClickListener(new Button.OnClickListener(){

            @Override
            public void onClick(View arg0) {
                // TODO Auto-generated method stub

                Intent myIntent = new Intent();

                myIntent.setAction(Intent.ACTION_VIEW);
                myIntent.setData(android.provider.MediaStore.Images.Media.INTERNAL_CONTENT_URI);
                startActivity(myIntent);

            }
        });
        Dail.setOnClickListener(new Button.OnClickListener(){

            @Override
            public void onClick(View arg0) {
                // TODO Auto-generated method stub

    /*Intent myIntent = new Intent();

    myIntent.setAction(Intent.ACTION_VIEW);
    myIntent.setData(android.provider.MediaStore.Images.Media.INTERNAL_CONTENT_URI);
    startActivity(myIntent);*/

                Intent i = new Intent(android.content.Intent.ACTION_DIAL,
                        Uri.parse("tel:+918147656011"));
                startActivity(i);
            }
        });
        CallLog.setOnClickListener(new Button.OnClickListener(){

            @Override
            public void onClick(View arg0) {
                // TODO Auto-generated method stub

                Intent myIntent = new Intent();

                myIntent.setAction(Intent.ACTION_CALL_BUTTON);
                startActivity(myIntent);
            }
        });

        Broswer.setOnClickListener(new Button.OnClickListener(){

            @Override
            public void onClick(View arg0) {
                // TODO Auto-generated method stub

                Intent i = new Intent(android.content.Intent.ACTION_VIEW,
                        Uri.parse("http://www.openglprojects.in"));
                startActivity(i);
            }
        });

        Map.setOnClickListener(new Button.OnClickListener(){

            @Override
            public void onClick(View arg0) {
                // TODO Auto-generated method stub

                Intent myIntent = new Intent();

                myIntent.setAction(Intent.ACTION_VIEW);
                myIntent.setData(Uri.parse("geo:37.827500,-122.481670"));
                startActivity(myIntent);

            }
        });


    }

    @Override
    public boolean onCreateOptionsMenu(Menu menu) {
        // Inflate the menu; this adds items to the action bar if it is present.
        getMenuInflater().inflate(R.menu.menu_main, menu);

        return true;
    }

    @Override
    public boolean onOptionsItemSelected(MenuItem item) {
        // TODO Auto-generated method stub
        //return super.onOptionsItemSelected(item);
        if(item.getItemId()==R.id.action_exit){
            this.finish();
            return true;
        }
        return false;
    }


}

Declare Activity in  AndroidManifest


6. Final step : If you have basic knowledge of developing android apps then you must know that, every activity you have in your application must be declared in your AndroidManifest.xml file. So Know place the following code in AndroidManifest.xml file.

We finished with out coding session, time to see our work in action. Go to Run menu(alt+u) click Run App or directly run the  program with shift +F10.

Check out the demo video -


Final Thoughts


In this how to call built-in applications using intents tutorial, we have call only 6 in build apps, while you can call others as well. You can replace the mobile number with our own in android intent example activity replacing the tel:+918147656011. Same can be done with website url and map Lat Long values by replacing http://www.openglprojects.in and geo:37.827500,-122.481670 respectively in MainActivity.java file. 

Hope you liked this android development tutorial, feel free to ask anything via comments. We assume that this small step will help you in developing android apps.

Friday, June 19, 2015

OpenGL Projects Android App available on Google Play Store


Hello fellow reader of OpenGL Projects blog, we have just launched our own Android App.

Now the OpenGL Projects Android App available on Google Play Store for your Android smartphones and tablets.This is the first version of our app on Google Play Store.This app let you have all the feature of OpenGL projects in your pocket. You don't have to on browsing any web browser rather can easily view all the articles on our Android App. Let take the advantage of this app.

Download OpenGL Projects Android App available on Google Play Store

The OpenGL projects Android app is compatible with almost all the Android Devices including the Old Android OS 2.2 and new updated Android 5.1. We hope you will download the app and take the full advantage with you.

Please not forget to rate our App and give us feedback to make it better.


Tuesday, May 19, 2015

3D Solar System OpenGL graphics program


We have seen many good programs on Solar System in OpenGL. Today we are going to present you a mode 3D modeled version of solar system graphics program. You might encountered the previous very simple solar system opengl program which remain at the top seen post on this blog. But this program is very much different as it includes many of the other space objects like stars and comets, also it has orbit and axis for each planet, which can be controlled by user. Also we can control the stars as well with keyboard.

Features of 3D OpenGL graphics program

This 3D graphics program is a very good project that can both be use for submitting at college's mini project or even in course for learning graphics. Unlike the previous solar system graphic project this program has many features.

Updating this post...........

For Code and Demo Contact at 8147656011 or whatsapp at 7022162923

Friday, May 15, 2015

Buy Project Report for any OpenGL Projects Mentioned

Hello  Fellow Readers!

We at OpenGL Projects works out to give you free source code for any of Computer graphics projects. We try hard to reach each of you via various platform including social media - Facebook, Google Plus etc, Comments, emails and whatsapp but due to time constraint and other works we are not able to reach you at the time. We ask for apology for not answering each of you. But you need to Understand our problem and hope you will.

We try hard to put source code easily downloadable but if you face problem we are sorry for it. Also we need feedback from you guys, which you all not providing to us. Try submit altered project so we can help other students as well in future. 

Now the main purpose of this post. Since we are busy in working we are not able to focus more on this blog. Most of you ask for source code, which we think is ok, but for report we hope that you are able to download a sample and do it your self. Our thought has gone wrong. So we decided to give services to those students who can't do it themselves. Also we don't have project report for all the projects. Since we need to devotee our precious time so we put a minimal fee for it. So now, you can Buy Project Report for any OpenGL Projects Mentioned in this blog.

Our new services includes -

  • Full Project Report on the OpenGL Projects (any) at Rs 500.
  • PPT creation for the Project (any) at Rs 200.
  • Video demo that helps line by line understanding of project at Rs 5000.
  • New Project(not on blog) with code and documentations (including videos) at Rs 10000.
  • Specific High Profile Project with code and documentations (including videos) starting at Rs 15000.
If you interested call 8147656011 or Whatsapp at 7022162923. Don't waste time on Fake calling and negotiations. 


Friday, May 8, 2015

OpenGL Tutorial in C/C++ For Doubly Linked List

There are many way by which you can learn OpenGL. Try Book from Edward Angle. You can also get many simple OpenGL tutorials in this blog as well.

Linked list is tough concept in C/C++. Today we are going to talk about it. There are mainly two kind of linked list - 
  1. Singly Linked list - The linked list that only one link node.
  2. Doubly Linked list - The linked list with two link node.
In the previous post we had already talk about the Singly Linked List, in this OpenGL Tutorial post we are going to learn about C/C++ For Doubly Linked List.

 Operation on Doubly Linked List

Like Singly Linked List many operations can be done on doubly linked list at both end of the node(both link). These are few doubly linked list operation which is given below –
  1. Creation
  2. Insert at Starting
  3. Insert at left
  4. Insert at Right
  5. Insert Front
  6. Insert Rear
  7. Delete at Left
  8. Delete at Right
  9. Delete Front
  10. Delete Rear
  11. Display
Before Going to the graphical OpenGL program for the Doubly Linked List, kindly refer to C program for Doubly Linked it first. If you understand it, then only go for opengl program.

Similar to the C++ Program, the Graphics program for Doubly Linked list also declare struct for three nodes – info, rlink, llink. Similar to Singly Linked List this program also takes input in different window while display in different window.


To display the node three simple rectangle has being drawn. These are linked with the line to other elements in the list. Drawing this in OpenGL is quite easy but need to understand the concept of C, so before going to this OpenGL tutorial program better read C program first.

Different menu has is given to user to choose the operation on the doubly linked list. Just need to right click and choose the Option. While Doing this kindly do slowly and do not do rubbish work else it might not work for you. This is not that effective graphics program but we can make it one window workable program as future enhancement.

Download Source code for Doubly Linked List OpenGL Tutorial Program


Wednesday, April 29, 2015

Mickey mouse using OpenGL computer graphics and animation

Everyone likes Mickey Mouse whether we are child or not. Today we are going to draw Mickey mouse using computer graphics and animation.

Mickey Mouse is most anticipated cartoon character throughout the world. It was created in 1928 by Walt Disney and Ub Iwerks. It is also the mascot of Walt Disney. There are many cartoon and animated movies being made and get popular with children. 

We have seen many of the drawing programs like Taj Mahal, today we are going to draw the funny Mickey mouse face with computer graphics and animation. Since it is the beginning for those learning computer graphics or animation via it, this program is simple as compare to the cartoon we see on TV.  You can view that in the image below, what we are drawing.


What this drawing programs do?


We are drawing a simple face of Mickey Mouse with little animation. The whole program is divided into different modules each defining the different parts of face. The Code accomplished with the comments which indicate what part it drawing. The no of lines of code is very less, hence easy for you all in understanding this program.

As you execute the program, first two ears will come and then the face in slow animation. Finally the eye, nose and mouth will appear. The animation is smooth as we are drawing a simple program. This computer graphics and animation don’t have any keyboard or mouse interaction. Also this is 2d version of program. The Face outlines and background color both can be easily change with little modification in the code.

Future scope

There are many things that can be added to this program which is listed below -

  • Convert this program to a 3D version.
  • Also add whole body of Mickey Mouse.
  • Make the body more colorful
  • Add animation with user interaction via keyboard and mouse.
  • Sound can also make this project wonderful.


 Hope You liked this simple computer graphics and animation drawing programs, post you suggest and queries in the comments below.


Monday, April 13, 2015

Mini Solar System Computer Graphics Programs


Presenting your C/C++ Mini Solar System Computer Graphics Programs which is executed in Visual Studio. This C++ mini project demo graphically the mini solar system.

What is mini Solar System?

As we all know there are 8 planets (Pluto being exclude to be a planet) in Solar system comprising Sun as it's center point. All planet revolve around Sun in solar system. There are planets in this start system, who owns satellite.

Update Coming Soon......................

Wednesday, April 8, 2015

Wind Mill C++ Projects Download

OpenGL c++ projects with source code
Are you looking for C++ Projects with source code?

Your search for C/C++ projects ends here! This post will give your the C/C++ mini projects which used the core library of OpenGL graphics. You can have this C/C++ Projects Download free from the download link given  at the end of the post.

Everybody know the importance of C/C++ in the computer science filed. Almost every engineer study the language, but only few master it.  For Computer science students learning the C/C++ language is much important, this shape their Carrier. They must master it and able to write programs which includes C/C++  features like functions, arrays and pointers, file handling and data structure, etc.

After mastering the basics of C/C++, you must be able to implement it in some kind of C/C++ projects or mini projects. But, the C/C++ projects or mini projects that features the above mentioned concepts is a difficult task. To solve these difficulty we provides C++ Projects Download. These projects can be use for college work or for final year projects or even as a reference for you research or learning process.

OpenGL is a open source graphics library which allow us to render real world objects in to computer graphics with C/C++ (can be use with other languages as well). Here our project will focus more on graphics than normal C/C++ programs. In this post we are going to talk about the Wind Mill C++ Projects with free source code download.

Wind Mill C++ Projects Download

Objective of Wind Mill C++ Projects


Every Project aim toward something, they have come core idea which need to be implemented. This Wind Mill C++ Projects is aimed to show generation of electricity via wind (renewable energy source). Basically it used the concept of wind energy in computer graphics with C++.

As you can see in the image, there is wind farm with a power house and few wind turbines. Cloud Can be seen in the sky as well. As the wind flow the speed of cloud increase (this used to show wind is flowing, air is invisible to us). Wind can flow in either direction, so the turbines blade will also move in the same direction as of the wind.

User Interaction Wind Mill C++ Projects

This C++ Projects used the mouse interaction to communicate between the computer and the user.  Right click the mouse button to see the options. Detail is shown in the table below.


MenuUses
No WindThere is no wind Flowing
Wind CWWindow Flowing in the Clockwise direction
Wind ACWWindow Flowing in the Anti-Clockwise direction
Fast Wind CWWindow Flowing Faster in the Clockwise direction
Fast Wind ACWWindow Flowing in the Anti-Clockwise direction
QuitLeave the Program

Now turn to have source code - C++ Projects Download free source code